Mercedes Sedan Headlight Replacement: Effortless Guide
Replacing a headlight on your Mercedes sedan might seem daunting, but it’s often a straightforward process you can tackle at home. This guide provides an easy-to-follow, step-by-step approach to safely replace your headlight, saving you time and money. We’ll cover the tools you need, the process itself, and some important safety considerations.
A burnt-out headlight not only diminishes your visibility at night but can also lead to a citation. Don’t worry; this guide will walk you through each step, from identifying the correct replacement bulb to the final check. We’ll help you get back on the road safely and confidently.
FAQ: Mercedes Headlight Replacement
- Q: How do I know which headlight bulb my Mercedes needs?
- A: Check your owner’s manual or an online parts database using your car’s year, make, and model. Many auto parts stores also have lookup tools.
- Q: What tools do I need to replace a headlight bulb?
- A: Typically, you’ll need gloves, a screwdriver (usually a Phillips head), and possibly a socket set. Some models might require specific tools, so check your manual.
- Q: Is it safe to replace a headlight bulb myself?
- A: Yes, as long as you follow safety precautions. Disconnect the battery, avoid touching the bulb glass, and ensure the new bulb is securely installed.
- Q: How long does it take to replace a headlight bulb?
- A: Generally, it takes about 15-30 minutes per headlight, depending on the car model and your experience.
- Q: What if I accidentally touch the glass part of the new bulb?
- A: Clean the bulb with rubbing alcohol and a clean cloth. Oils from your skin can cause the bulb to overheat and fail prematurely.
- Q: Do I need to replace both headlights at the same time?
- A: It’s recommended to replace both headlights together. If one bulb has failed, the other is likely to fail soon as well. Replacing them together ensures even brightness and color.
- Q: What type of headlight bulb should I buy?
- A: Choose a bulb that matches the specifications in your owner’s manual. Options include halogen, LED, and xenon (HID), each with different brightness and lifespan characteristics.
Tools You’ll Need

Before you begin, gather these essential tools:
- New headlight bulb(s) – Confirm the correct type for your Mercedes model.
- Gloves – To protect the bulb and your hands.
- Screwdriver (Phillips or flathead) – Depending on your Mercedes model.
- Socket set (optional) – Some models require socket wrenches.
- Work light or flashlight – For better visibility.
- Soft cloth or towel – To protect your car’s finish.
Safety First

Before you start, prioritize safety:
- Disconnect the Battery: Disconnect the negative terminal of your car battery to prevent electrical shock.
- Wear Gloves: Always wear gloves when handling headlight bulbs. Oil from your skin can damage the bulb and shorten its lifespan.
- Work in a Well-Lit Area: Ensure you have adequate lighting to see what you’re doing.
- Consult Your Owner’s Manual: Refer to your Mercedes owner’s manual for specific instructions and diagrams related to your model.
Step-by-Step Guide to Mercedes Headlight Replacement

Follow these steps to replace your Mercedes sedan headlight:
Step 1: Accessing the Headlight Assembly
The first step is to gain access to the headlight assembly. The method varies depending on your Mercedes model. Here are a few common scenarios:
- From Under the Hood: Many Mercedes models allow access to the headlight assembly by opening the hood. Look for a plastic or metal cover behind the headlight.
- Through the Wheel Well: Some models require you to remove the wheel well liner to access the headlight. Turn the steering wheel to provide more room and use a screwdriver or socket wrench to remove the retaining screws or clips.
- Removing the Headlight Housing: In some cases, you may need to remove the entire headlight housing. This usually involves unscrewing several bolts and disconnecting electrical connectors.
Example: Accessing Headlight on a C-Class (W205)
On many W205 C-Class models, you can access the headlight assembly from under the hood. Simply locate the access panel behind the headlight unit.
Step 2: Removing the Old Headlight Bulb
Once you’ve accessed the headlight assembly, you can remove the old bulb:
- Disconnect the Electrical Connector: Gently detach the electrical connector from the back of the bulb. Be careful not to pull on the wires.
- Remove the Retaining Clip or Ring: Most headlight bulbs are held in place by a wire clip or a rotating retaining ring. Depending on the design, you may need to press down on the clip and move it to the side, or rotate the retaining ring counterclockwise.
- Remove the Old Bulb: Carefully pull the old bulb straight out of the socket. Avoid touching the glass.
Pro Tip: Take a picture of the bulb and clip configuration before removing anything. This will help you remember how to reinstall everything correctly.
Step 3: Installing the New Headlight Bulb
Now it’s time to install the new headlight bulb:
- Align the New Bulb: Make sure the new bulb is the correct type and align it properly with the socket. The bulb should only fit one way.
- Insert the New Bulb: Gently push the new bulb into the socket until it is fully seated.
- Secure the Retaining Clip or Ring: Reattach the wire clip or rotate the retaining ring to secure the new bulb in place. Ensure it is firmly locked.
- Reconnect the Electrical Connector: Plug the electrical connector back into the bulb. Make sure it clicks into place.
Important: Never touch the glass part of the new bulb with your bare hands. If you do, clean it with rubbing alcohol and a clean cloth.
Step 4: Testing the New Headlight
Before reassembling everything, test the new headlight:
- Reconnect the Battery: Reconnect the negative terminal of your car battery.
- Turn on the Headlights: Turn on your headlights to ensure the new bulb is working correctly. Check both low and high beams.
If the headlight doesn’t turn on, double-check the electrical connector and the bulb’s seating. Also, verify that the bulb is the correct type for your vehicle.
Step 5: Reassembling the Headlight Assembly
Once you’ve confirmed that the new headlight is working, reassemble the headlight assembly:
- Reinstall the Access Panel or Wheel Well Liner: If you removed an access panel or wheel well liner, reattach it using the screws or clips you removed earlier.
- Reinstall the Headlight Housing (if removed): If you removed the entire headlight housing, reattach it using the bolts and electrical connectors. Make sure everything is securely fastened.
Torque Specifications: If you removed the headlight housing, refer to your owner’s manual for the correct torque specifications for the bolts.
Troubleshooting
Here are some common issues you might encounter and how to resolve them:
- Headlight Doesn’t Turn On:
- Check the bulb type and ensure it matches your vehicle’s specifications.
- Verify the electrical connector is securely attached.
- Check the fuse for the headlight circuit.
- Headlight is Dim:
- Ensure the bulb is properly seated in the socket.
- Check for corrosion on the electrical connector.
- Consider replacing both headlights at the same time, as the other bulb may be nearing the end of its life.
- Headlight Flickers:
- Check the electrical connections for looseness.
- Inspect the wiring for damage.
- The bulb may be faulty and need replacement.
Headlight Bulb Types for Mercedes Sedans

Mercedes-Benz vehicles use a variety of headlight bulb types, depending on the model and year. Here’s a table outlining common types:
| Bulb Type | Description | Typical Mercedes Models |
|---|---|---|
| Halogen | Standard bulb, cost-effective and widely used. | Older C-Class, E-Class, and S-Class models |
| Xenon (HID) | High-intensity discharge, brighter and longer-lasting than halogen. | Mid-range and higher-end C-Class, E-Class, and S-Class models |
| LED | Light-emitting diode, energy-efficient and very long-lasting. | Newer C-Class, E-Class, and S-Class models, especially those with upgraded lighting packages |
| Laser | Advanced lighting technology, extremely bright and precise. | High-end S-Class models with advanced lighting options |
When to Consider Professional Help
While replacing a headlight bulb is often a DIY-friendly task, there are situations where professional help is recommended:
- Complex Headlight Assemblies: Some newer Mercedes models have complex headlight assemblies that require specialized tools or knowledge to disassemble and reassemble correctly.
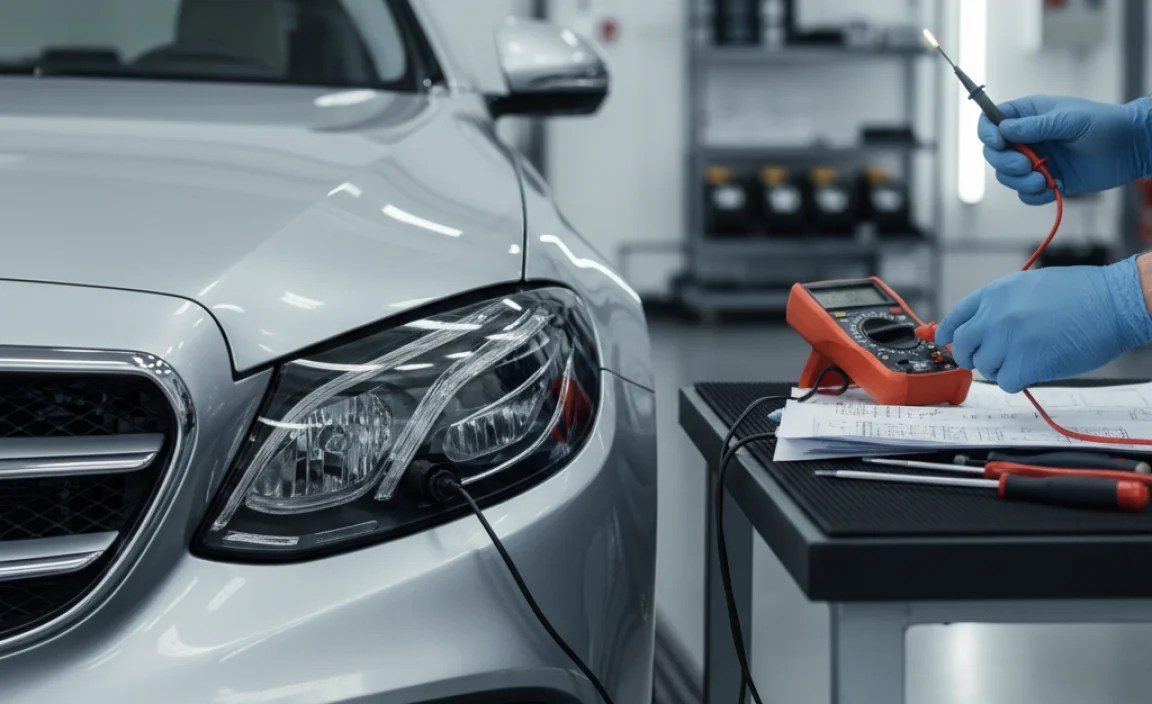
- Electrical Issues: If you suspect an electrical problem, such as a faulty wiring harness or a blown fuse, it’s best to consult a qualified mechanic.
- Xenon (HID) Headlights: Xenon headlights operate at high voltage and can be dangerous to handle without proper training. If you’re not comfortable working with high-voltage systems, it’s best to leave this to a professional.
Tips for Maintaining Your Mercedes Headlights
Proper headlight maintenance can improve visibility and extend the life of your bulbs:
- Keep Headlights Clean: Regularly clean your headlights with a mild soap and water solution to remove dirt, grime, and road debris.
- Check for Condensation: If you notice condensation inside your headlight housing, inspect the seals for damage and replace them if necessary.
- Replace Bulbs in Pairs: When one headlight bulb fails, replace both bulbs at the same time. This ensures even brightness and color, and prevents the other bulb from failing shortly after.
- Use High-Quality Bulbs: Invest in high-quality headlight bulbs from reputable brands. These bulbs are designed to provide optimal performance and longevity.
External Resource: For more information on headlight maintenance and safety, visit the National Highway Traffic Safety Administration (NHTSA) website.
Choosing the Right Replacement Bulb
Selecting the correct replacement bulb is critical for optimal performance and safety. Consider these factors:
- Bulb Type: Refer to your owner’s manual or an online parts database to identify the correct bulb type for your Mercedes model.
- Brightness: Choose a bulb with the appropriate brightness for your needs. Halogen bulbs are typically measured in lumens, while LED and HID bulbs are measured in color temperature (Kelvin).
- Lifespan: Consider the lifespan of the bulb. LED bulbs generally have a longer lifespan than halogen or HID bulbs.
- Brand: Opt for reputable brands known for quality and reliability.
Comparing Headlight Technologies
Here’s a comparison of different headlight technologies:
| Technology | Brightness | Lifespan | Cost | Pros | Cons |
|---|---|---|---|---|---|
| Halogen | Moderate | Moderate | Low | Affordable, easy to replace | Less bright, shorter lifespan |
| Xenon (HID) | High | Long | Moderate to High | Brighter, longer lifespan | More expensive, requires ballast |
| LED | Very High | Very Long | High | Energy-efficient, very long lifespan, instant on/off | Most expensive, can be complex to install |
Advanced Headlight Features in Modern Mercedes Sedans
Modern Mercedes-Benz sedans often come equipped with advanced headlight features that enhance visibility and safety:
- Adaptive Highbeam Assist: Automatically adjusts the high beams to avoid blinding oncoming traffic.
- Active Curve Illumination: Swivels the headlights to illuminate curves and corners.
- LED Intelligent Light System: Adapts the headlight distribution to various driving conditions, such as city, highway, and adverse weather.
- Ultra Wide Beam Headlights: Provide a wider beam pattern for improved visibility at night.
Conclusion
Replacing a headlight on your Mercedes sedan is a manageable task that can save you time and money. By following this comprehensive guide, you can confidently tackle this project and ensure your Mercedes is safe and properly illuminated. Remember to prioritize safety, use the correct tools, and consult your owner’s manual for specific instructions related to your model. With a little patience and attention to detail, you’ll be back on the road with clear visibility in no time. Safe driving!
“`


