Mercedes Sedan LED Upgrade: Effortless & Stunning Transformation
Want to give your Mercedes sedan a modern, luxurious look? Upgrading to LED lights is the easiest way to do it! This simple change boosts visibility, enhances style, and makes your ride stand out. Swapping out those old, dim bulbs for brighter, longer-lasting LEDs is a quick weekend project. Ready to transform your Mercedes? Let’s dive in!
This guide walks you through every step of upgrading your Mercedes sedan’s lights to LEDs. You’ll learn which bulbs to buy, the tools you’ll need, and how to install them safely. Get ready to enjoy a brighter, more stylish drive!
Why Upgrade to LEDs in Your Mercedes Sedan?

Switching to LEDs offers a ton of benefits for your Mercedes. Here’s why it’s a popular upgrade:
- Enhanced Visibility: LEDs are much brighter than halogen bulbs, making it easier to see at night and in bad weather.
- Modern Look: LEDs give your car a sleek, modern appearance that rivals newer models.
- Longer Lifespan: LEDs last significantly longer than traditional bulbs, saving you money and hassle in the long run.
- Energy Efficiency: LEDs use less power, which can help improve your car’s fuel efficiency.
- Instant Illumination: LEDs light up instantly, providing immediate visibility and reaction time.
Choosing the Right LEDs for Your Mercedes Sedan

Not all LEDs are created equal! To get the best results, you need to choose the right bulbs for your specific Mercedes model and year. Here’s what to consider:
1. Bulb Size and Type
Your Mercedes uses different bulb sizes for different lights (headlights, taillights, turn signals, etc.). Check your owner’s manual or an online bulb compatibility guide to find the correct sizes for your car. Common bulb types include:
- Headlights: H7, H11, D1S, D3S (depending on model and year)
- Taillights: 1156, 7443
- Turn Signals: 1157, 7440
- Fog Lights: H11, 9006
- Interior Lights: Festoon, 194, T10
2. LED Quality and Brightness
Look for LEDs from reputable brands that offer good light output and reliability. Brightness is measured in lumens; higher lumens mean a brighter light. However, be careful not to go too bright, as excessively bright lights can be blinding to other drivers.
3. Color Temperature
Color temperature is measured in Kelvin (K). For a clean, modern look, choose LEDs with a color temperature between 5000K and 6000K. This will give you a crisp, white light without being too blue.
4. CAN Bus Compatibility
Many modern Mercedes vehicles use a CAN Bus system to monitor the car’s electrical system. If you install LEDs that aren’t CAN Bus compatible, you may get error messages or flickering lights. Look for LEDs that are specifically designed to work with CAN Bus systems.
5. Legal Considerations
Make sure the LEDs you choose are legal for street use in your area. Some LEDs may not be DOT approved, which means they’re not legal for use on public roads. Check your local laws before installing any aftermarket lighting.
Tools You’ll Need

Before you start the LED upgrade, gather these essential tools:
- LED Bulbs: The correct size and type for your Mercedes model.
- Screwdrivers: Both flathead and Phillips head screwdrivers in various sizes.
- Socket Set: For removing and installing screws and bolts.
- Pliers: For gripping and maneuvering small parts.
- Trim Removal Tools: To avoid damaging interior trim pieces.
- Gloves: To protect your hands.
- Work Light: To illuminate the work area.
- Owner’s Manual: For reference and guidance.
Step-by-Step Guide to Upgrading Your Mercedes Sedan’s Lights to LEDs

Follow these steps to upgrade your Mercedes sedan’s lights to LEDs. Remember to work carefully and consult your owner’s manual if you’re unsure about any step.
1. Headlight Upgrade
- Access the Headlight Housing: Open the hood and locate the headlight housing. You may need to remove some plastic covers or trim pieces to access it.
- Disconnect the Wiring Harness: Disconnect the wiring harness from the back of the headlight bulb.
- Remove the Old Bulb: Depending on your car, you may need to twist, unclip, or unscrew the old bulb to remove it.
- Install the New LED Bulb: Insert the new LED bulb into the headlight housing and secure it in place.
- Reconnect the Wiring Harness: Reconnect the wiring harness to the back of the LED bulb.
- Test the Light: Turn on the headlights to make sure the new LED bulb is working correctly.
- Repeat for the Other Side: Repeat these steps for the other headlight.
2. Taillight Upgrade
- Access the Taillight Housing: Open the trunk and locate the taillight housing. You may need to remove some interior trim pieces to access it.
- Disconnect the Wiring Harness: Disconnect the wiring harness from the back of the taillight bulb.
- Remove the Old Bulb: Twist the old bulb to remove it from the taillight housing.
- Install the New LED Bulb: Insert the new LED bulb into the taillight housing and twist it to secure it in place.
- Reconnect the Wiring Harness: Reconnect the wiring harness to the back of the LED bulb.
- Test the Light: Turn on the taillights to make sure the new LED bulb is working correctly. Also, test the brake lights and turn signals.
- Repeat for the Other Side: Repeat these steps for the other taillight.
3. Turn Signal Upgrade
- Access the Turn Signal Housing: Depending on your car, the turn signal housing may be located in the headlight or taillight assembly, or in a separate housing.
- Disconnect the Wiring Harness: Disconnect the wiring harness from the back of the turn signal bulb.
- Remove the Old Bulb: Twist the old bulb to remove it from the turn signal housing.
- Install the New LED Bulb: Insert the new LED bulb into the turn signal housing and twist it to secure it in place.
- Reconnect the Wiring Harness: Reconnect the wiring harness to the back of the LED bulb.
- Test the Light: Turn on the turn signals to make sure the new LED bulb is working correctly.
- Repeat for the Other Side: Repeat these steps for the other turn signal.
4. Interior Light Upgrade
- Locate the Interior Lights: Identify all the interior lights you want to upgrade (dome lights, map lights, door lights, etc.).
- Remove the Lens Cover: Use a trim removal tool or a flathead screwdriver to carefully pry off the lens cover.
- Remove the Old Bulb: Pull the old bulb straight out of the socket.
- Install the New LED Bulb: Push the new LED bulb into the socket.
- Replace the Lens Cover: Snap the lens cover back into place.
- Test the Light: Turn on the interior lights to make sure the new LED bulb is working correctly.
- Repeat for All Interior Lights: Repeat these steps for all the interior lights you want to upgrade.
Troubleshooting Common Issues
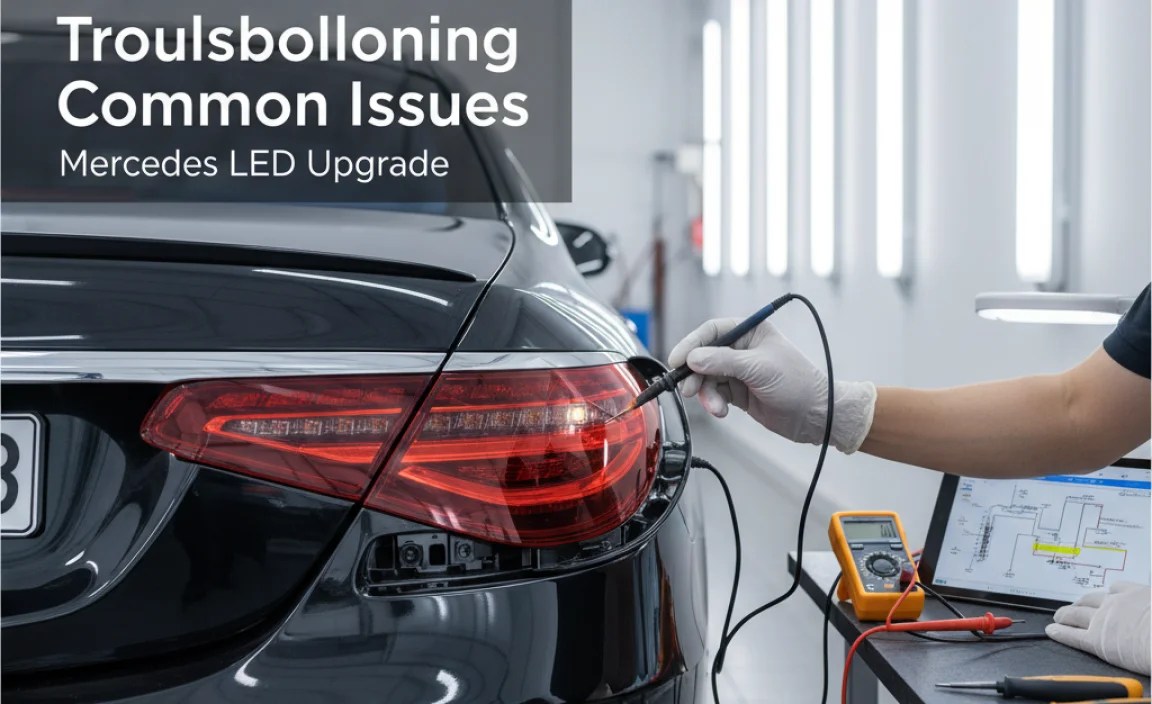
Sometimes, things don’t go as planned. Here are some common issues you might encounter and how to fix them:
- Flickering Lights: This is often caused by CAN Bus incompatibility. Try using CAN Bus compatible LEDs or installing a load resistor.
- Error Messages: This is another sign of CAN Bus incompatibility. Again, try using CAN Bus compatible LEDs or installing a load resistor.
- Lights Not Working: Double-check that the LED bulb is properly installed and that the wiring harness is securely connected. Also, check the fuse for that circuit.
- Bulb Doesn’t Fit: Make sure you have the correct bulb size for your car. Consult your owner’s manual or an online bulb compatibility guide.
Understanding CAN Bus Systems and Load Resistors
CAN Bus (Controller Area Network) is a communication system used in modern cars to allow various electronic control units (ECUs) to communicate with each other. When you replace a traditional bulb with an LED, the car’s computer may detect a lower current draw, which can trigger error messages or cause the lights to flicker.
Load resistors mimic the power draw of a traditional bulb, tricking the car’s computer into thinking everything is normal. They’re easy to install: simply connect the resistor in parallel with the LED bulb.
Here’s a simplified look at how CAN Bus works:
<table>
<thead>
<tr>
<th>Component</th>
<th>Function</th>
<th>Relevance to LED Upgrade</th>
</tr>
</thead>
<tbody>
<tr>
<td>ECU (Engine Control Unit)</td>
<td>Manages engine performance</td>
<td>Communicates with other ECUs</td>
</tr>
<tr>
<td>BCM (Body Control Module)</td>
<td>Controls lights, windows, locks</td>
<td>Monitors bulb status; may cause errors with LEDs</td>
</tr>
<tr>
<td>CAN Bus Network</td>
<td>Communication pathway between ECUs</td>
<td>Allows BCM to detect changes in electrical load</td>
</tr>
<tr>
<td>Load Resistor</td>
<td>Simulates the load of a traditional bulb</td>
<td>Prevents CAN Bus errors when using LEDs</td>
</tr>
</tbody>
</table>
Maintaining Your LED Lights
LEDs are generally low-maintenance, but here are a few tips to keep them working their best:
- Keep Them Clean: Clean your headlights and taillights regularly to remove dirt and debris that can reduce light output.
- Check for Damage: Inspect your lights periodically for any cracks or damage. Replace any damaged lights immediately.
- Use Quality Products: Invest in high-quality LED bulbs from reputable brands to ensure long life and reliable performance.
Cost of a Mercedes Sedan LED Upgrade
The cost of an LED upgrade can vary depending on the quality of the bulbs and whether you install them yourself or hire a professional. Here’s a rough estimate:
<table>
<thead>
<tr>
<th>Component</th>
<th>Estimated Cost (DIY)</th>
<th>Estimated Cost (Professional Installation)</th>
</tr>
</thead>
<tbody>
<tr>
<td>LED Headlight Bulbs (Pair)</td>
<td>$50 – $200</td>
<td>$150 – $400</td>
</tr>
<tr>
<td>LED Taillight Bulbs (Pair)</td>
<td>$30 – $100</td>
<td>$100 – $250</td>
</tr>
<tr>
<td>LED Turn Signal Bulbs (Pair)</td>
<td>$20 – $80</td>
<td>$80 – $200</td>
</tr>
<tr>
<td>LED Interior Bulbs (Full Set)</td>
<td>$20 – $50</td>
<td>$50 – $150</td>
</tr>
<tr>
<td>Load Resistors (if needed)</td>
<td>$10 – $30</td>
<td>$30 – $80</td>
</tr>
</tbody>
</table>
DIY Installation: Doing it yourself can save you a lot of money on labor costs. However, it requires some mechanical skill and patience.
Professional Installation: Hiring a professional ensures the job is done correctly and safely. It’s a good option if you’re not comfortable working on your car’s electrical system.
Resources for Finding the Right Bulbs
Here are some helpful resources for finding the right LED bulbs for your Mercedes sedan:
- Your Owner’s Manual: This is the best place to start. It lists the bulb sizes for all the lights in your car.
- Online Bulb Compatibility Guides: Many websites offer bulb compatibility guides that allow you to enter your car’s make, model, and year to find the correct bulb sizes.
- Automotive Forums: Mercedes-Benz forums are a great place to ask other owners for recommendations and advice.
- Reputable Online Retailers: Look for reputable online retailers that specialize in automotive lighting.
FAQ: Mercedes Sedan LED Upgrade
Q1: What are the benefits of upgrading to LED lights?
LEDs are brighter, last longer, use less energy, and give your car a modern look.
Q2: How do I find the right LED bulb size for my Mercedes?
Check your owner’s manual or an online bulb compatibility guide.
Q3: What is CAN Bus, and why is it important for LED upgrades?
CAN Bus is a communication system in modern cars. You need CAN Bus compatible LEDs to avoid error messages.
Q4: What are load resistors, and when do I need them?
Load resistors mimic the power draw of traditional bulbs and prevent CAN Bus errors when using LEDs.
Q5: Can I install LED lights myself, or should I hire a professional?
If you’re comfortable working on cars, you can install them yourself. Otherwise, hire a professional.
Q6: Are LED headlights legal for street use?
Make sure the LEDs you choose are DOT approved and legal in your area.
Q7: How do I maintain my LED lights?
Keep them clean, check for damage, and use high-quality bulbs.
Conclusion
Upgrading your Mercedes sedan’s lights to LEDs is a simple yet effective way to enhance its style, safety, and efficiency. By following this guide, you can confidently choose the right LEDs, install them correctly, and enjoy the many benefits they offer. Whether you’re a seasoned DIYer or a first-time car modifier, this upgrade is within your reach. So, get ready to transform your Mercedes and experience the road in a whole new light!
Remember to always prioritize safety and consult your owner’s manual when working on your car. Happy driving!
“`


